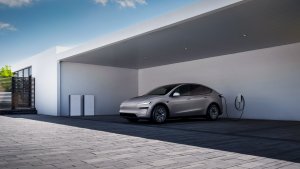
One of the features of the 2025 Tesla Holiday Update is the ability for Tesla owners to make custom wraps for their vehicles. The wraps will be displayed in the vehicle’s visualizations and in the Tesla app. You’ll also be able to select one of the wraps Tesla has provided if you prefer not to make or download your own.
This feature is available for the Cybertruck, Model 3, and Model Y, but it’ll likely be available for 2021+ Model S and Model X vehicles in the future as well. It even supports older Intel-based vehicles.
Making your own wrap is easy and takes just a few minutes. It doesn’t even require any special tools or software because Tesla provided a template.
Making a Custom Wrap
We’ll walk you through the steps to create your custom wrap. All you’ll need is an image editing program and an image editing program.
Download the Template
Tesla has all the details on their Github repository for Custom Wraps, but you can simply download the template below and open it in your favorite image editor like Adobe Photoshop, GIMP or even Windows Paint on Windows 11. Any software that supports layers will work.
Image Editor
Open the template in your image editor and create a new layer on top of it. You’ll want to edit on this new layer, not on the template layer, which we’ll hide later.

Create the Wrap
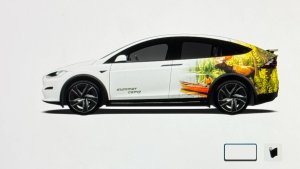
Go ahead and work your artistic magic—here, we’ve taken a graffiti rendition of Not A Tesla App and our logo and placed it within the template's bounds.

Hide the Template
Go ahead and hide the template layer - you can also delete the layer if you want. This standalone image doesn’t look like much, but this is what we need for the final step.

Export
You’ll want to export the image with transparency - so it needs to be a .png file. You'll be good to go as long as it's the same dimensions as the template. We’ve gone ahead and exported our custom NATA wrap here - feel free to download it and let us know how it looks once you get the 2024.44.25 update.

A couple of technical limitations:
The image must be 1024x768 pixels.
File Size max is 1MB.
You can’t use any special characters in the file name, and it must be shorter than 30 characters.
PNG is the only acceptable file format
You can load up to 10 images on your USB drive
Add Wrap to USB Drive
The last, and easiest step. Grab your USB drive, and create a folder called “Wraps” at the root level of the drive. Place your images in there, and you’re all set.
Load a Custom Wrap

After placing the images on your USB drive and inserting it in your vehicle, you can then open Toybox > Paint Shop, and tap on Wrap. From there select your wrap from the custom list of images.