Tesla lets owners customize the sound their vehicle makes when locking, which adds a bit of personality to something most cars treat as a simple beep, or worse — a honk.
The feature, which lets users select a lock sound from a preset list, was introduced in the 2023 Holiday Update. In addition to being able to choose from a predefined list of sounds, Tesla also lets you add any custom sound by uploading your own sound file.
Below is information on how to set and create a custom lock sound for your Tesla.
Vehicle Requirements
To use a custom lock sound, the vehicle must have Tesla’s external pedestrian warning system (PWS) speaker. This speaker began appearing in Tesla vehicles around September 2019, though rollout timing varies by model and region.
Some vehicles built during that transition period may be missing the speaker, but still have the wiring in place. In those cases, retrofitting the PWS is possible by contacting Tesla Service.
You’ll know whether your vehicle has a PWS speaker if it emits a sound at low speeds.
Finding Custom Sounds
We’ve created a whole page dedicated to Tesla’s custom lock sounds. The page includes some of the most popular lock sounds, such as retro video game sounds, iconic cartoon sound clips, and much more. The sounds are optimized for use in your vehicle and meet all the requirements.
Simply download the file, rename it LockChime.wav, and place it on your vehicle’s USB drive.
How to Save a Custom Sound
You can use any sound you’d like, but there are a few limitations and requirements you must follow, which include:
The sound must be a .wav file
The file must be under 1 MB
The file must be named LockChime
The sound file needs to be placed in the root directory of the USB drive (not inside any folder). All recent Tesla vehicles include a USB drive where Dashcam and Sentry Mode footage is saved. This drive is located in the vehicle's glove box.
Users must remove the USB drive, plug it into their computer, save the sound, and then plug it back into the car.
Some operating systems hide file extensions. If you downloaded the file from our lock sounds page, it’s already in the proper format, and you just need to rename it LockChime.
Current Limitations
Only one custom sound can be used at a time. Tesla does not currently allow multiple custom lock sounds to be on the drive and selected through the touchscreen. If you’re interested in multiple lock sounds, the easiest method right now is to save multiple sounds on the USB drive with different names. Then, rename the sound you want to use to LockChime.wav.
Choosing Your Lock Sound
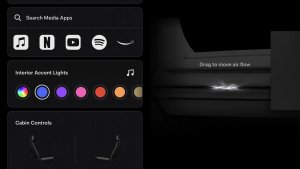
To choose your custom lock sound, you’ll need to go to Tesla’s Boombox feature.
Open Toybox (you’ll likely have to look in the All apps menu (the three dots icon in the dock)
Tap Boombox
Enable Lock Sound
Choose USB from the sound list
If you’d like to use your custom sound that you added to the USB drive, select USB from the menu.
Custom Horn Sound
While you’re in the Boombox, you’ll notice that Tesla also lets you set a custom horn sound. To use a different sound for the vehicle’s horn, just enable the feature and choose a sound from the dropdown list.
While Tesla allows a custom horn sound, it’s only used while the vehicle is in Park. When driving, the horn defaults to its standard sound due to NHTSA regulations.